> ## Documentation Index
> Fetch the complete documentation index at: https://makeswift-sasha-eng-8460-create-a-guide-for-troubleshooting.mintlify.site/llms.txt
> Use this file to discover all available pages before exploring further.
# registerComponent
> Adds your components to the Makeswift builder.
export const IconList = () => {
const icons = ["billing", "bolt", "button", "carousel", "chats", "code", "countdown", "cube", "database", "divider", "form", "gallery", "help", "image", "layout", "lock", "navigation", "social-links", "star", "text", "users", "video"];
return
{icons.map(icon =>

{icon}
)}
;
};
## Arguments
{/* prettier-ignore-start */}
1.
Your component to be registered. This can be a React component or a function.
2.
Options for site version and locale.
A unique string that identifies the component for Makeswift to
render. Don't change the type once you use the component in
the Makeswift builder.
If this value changes after you use the component in the Makeswift builder, the component will appear as a "Component not found" block. To fix this, restore the `type` to the original value, or delete this component and re-add add it to the page.
The label shown in the Makeswift builder.
The icon shown in the Makeswift builder. You can find all available icons in the [icons list](#icons-list) section.
A boolean that determines whether or not this component will be displayed in the Component Tray.
An object mapping prop names to Makeswift [controls](/developer/concepts#controls).
{/* prettier-ignore-end */}
## Examples
### Registering a box
This example shows how to register a `Box` component. `'box'` is the value for `type`, which must
be unique, as Makeswift uses this value to identify the component. This value shouldn't change once you use the
component in the Makeswift builder. `'Box'` is the `label`, which appears in
the Makeswift builder. The example applies a [`Style`](/developer/reference/controls/style) control to the
`className` prop.
```tsx makeswift/components.tsx
import { Style } from "@makeswift/runtime/controls";
import { runtime } from "./runtime";
function Box({ className }) {
return I'm a box!
;
}
runtime.registerComponent(Box, {
type: "box",
label: "Box",
props: {
className: Style({ properties: Style.All }),
},
});
```
### Creating sections
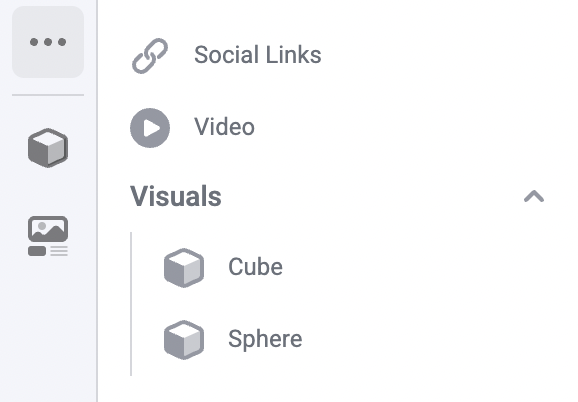
This example shows how to register a `Cube` and a `Sphere` component under a "Visuals" section. In each
components' `label`, use slashes to separate the section name and component name. In the Makeswift
builder, both components appear under the same Visuals collapsible section:
 ```tsx makeswift/components.tsx
import { Style } from "@makeswift/runtime/controls";
function Cube({ className }) {
return
```tsx makeswift/components.tsx
import { Style } from "@makeswift/runtime/controls";
function Cube({ className }) {
return Cube!
;
}
function Sphere({ className }) {
return Sphere!
;
}
runtime.registerComponent(Cube, {
type: "cube",
label: "Visuals/Cube",
props: {
className: Style({ properties: Style.All }),
},
});
runtime.registerComponent(Sphere, {
type: "sphere",
label: "Visuals/Sphere",
props: {
className: Style({ properties: Style.All }),
},
});
```
### Adding custom icons
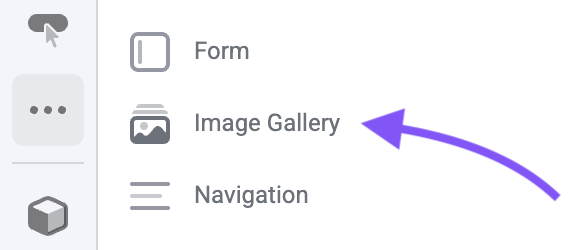
This example shows how to register an `ImageGallery` component with a custom icon. We
import `ComponentIcon` from `@makeswift/runtime` and pass
`ComponentIcon.Gallery` as the `icon` for our component.
You can find all available icons in the [icons list](#icons-list) section.
In the builder
component tray, we can see our component with the selected icon.
 ```tsx makeswift/components.tsx
import { Style } from "@makeswift/runtime/controls";
import { ComponentIcon } from "@makeswift/runtime";
import { runtime } from "./runtime";
function ImageGallery({ className }) {
return
```tsx makeswift/components.tsx
import { Style } from "@makeswift/runtime/controls";
import { ComponentIcon } from "@makeswift/runtime";
import { runtime } from "./runtime";
function ImageGallery({ className }) {
return I'm an image gallery!
;
}
runtime.registerComponent(Cube, {
type: "image-galley",
label: "ImageGallery",
icon: ComponentIcon.Gallery,
props: {
className: Style({ properties: Style.All }),
},
});
```
### Organizing registration code
As you register more components in `makeswift/components.tsx`, you may notice this file growing rather large. To keep your codebase organized, we recommend breaking out your Makeswift registration code into separate files and co-locating it with your component file.
For example, if you have a `Box` component, you can create a `Box.makeswift.ts` file next to your `Box.tsx` file. This file will contain the registration code for the `Box` component.
Makeswift does **not** rely on this naming convention. Feel free to use
whatever naming convention you prefer.
```tsx components/Box/Box.tsx
interface Props {
className?: string;
}
function Box({ className }) {
return I'm a box!
;
}
```
```tsx components/Box/Box.makeswift.ts
import { Style } from "@makeswift/runtime/controls";
import { runtime } from "@/makeswift/runtime";
import { Box } from "./Box";
runtime.registerComponent(Box, {
type: "box",
label: "Box",
props: {
className: Style({ properties: Style.All }),
},
});
```
Then update your `makeswift/components.tsx` file to import all of the component registrations, like so:
```ts makeswift/components.ts
import "@/components/Box/Box.makeswift";
import "@/components/Cube/Cube.makeswift";
import "@/components/Sphere/Sphere.makeswift";
/*
* Add all of your component registrations here
*/
```
The file `makeswift/components.ts` should be imported wherever you use [``](/developer/reference/components/react-runtime-provider) in your app.
## Icons List
Here is the list of available icons to use when registering your component.